Click on the images to see larger versions of them.

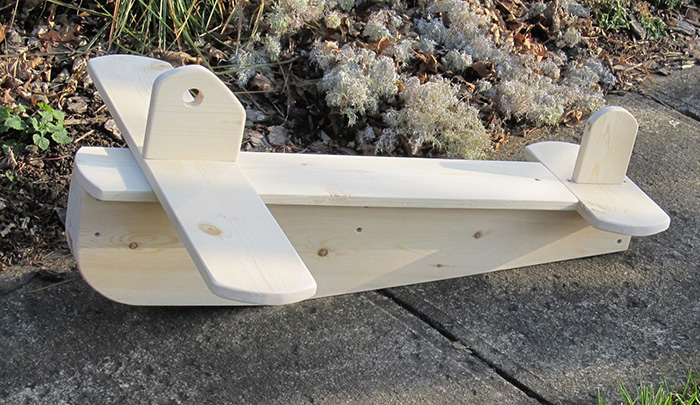
Amazing!!!
I had seen a version of this on a photography blog and I swooned over it for days.
I knew that I could make one similar if I could just find the time to sit down and sketch it all out. It is really pretty straight forward once you break it down into sections; body, wings, tail. To make it here is what you will need to buy:
1- 2x4x8
1- 1x8x8
1- 1x6x10
1″ dowel, 6-8 inches long
Box of 2″ Outdoor screws
A handful of 1 1/4″ outdoor screws
1- 3″ lag screw for prop (plus a few washers)
20′ +/- rope
1- 3″ eye screw
4- 3″ long eye lag bolts, plus washers. (mine were 5″ and way too long)
2 rope clips
Plus finishing materials like sandpaper, glue, and paint.
Then for a rough idea of all the cuts, see below. I found it very nice/easy to mark out most of my cuts before I started, including most of the curves. I so wish I knew how to use SketchUp so that I could share more details with you.
Body:
1-2×4 @ 36″ (tapered to back)
2- 1×8 @ 36″ (tapered to back, rounded at front bottom)
1- 1×6 @ 30.5″ (seat)
Tail:
1- 1×6 @ 12″ (rounded ends)
1 – 1×4 @5″ (rounded top)
Wings:
2- 1×6 @ 30″ (rounded ends)
2- 2×4 @8 1/8″ (spacer boards)
Handle bar cut from scrap 1×6 with hole for 1″ dowel/handle.
Propeller:
cut from 1×3 scrap

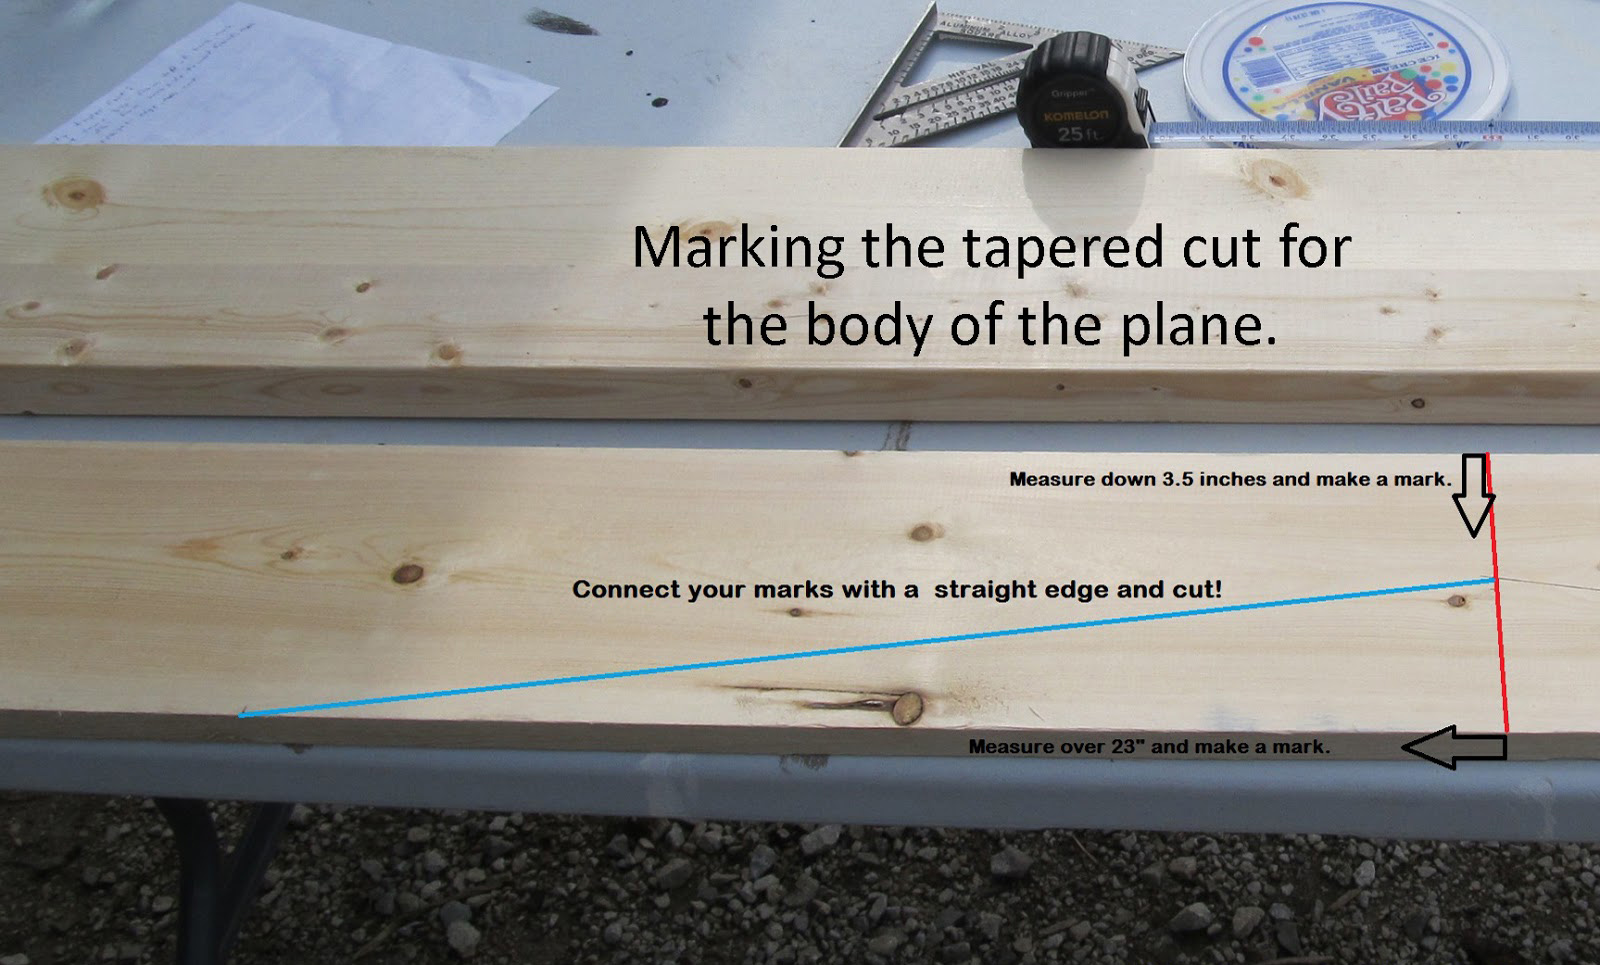
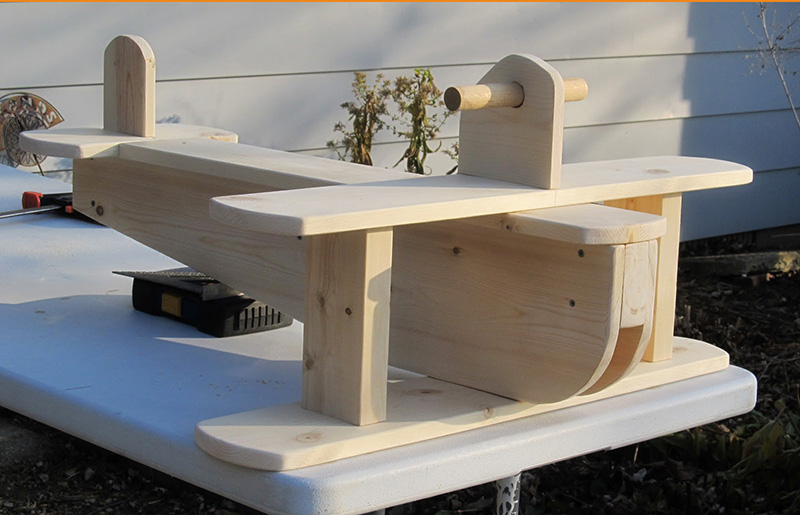
The very first and most thought consuming cut I did was the body cut. The body is made up of a 2×4 sandwiched between two 1×8’s. Then it is later topped with a 1×6 for the seat. So cut your 2×4 and 2 1×8’s all to 36″ long. Then on each 1×8, mark a curve for the front (I used my ice cream pail lid). Then from the other end of the board measure down 3.5″ from the top and make a mark. Then measure 23″ from the back toward the front and make a mark. Use a straight edge and connect the marks to give you the angle cut. Cut that with a circular saw and use a jig saw on the front curve. Here is a very poor photo to give you a rough idea of what the heck I am talking about.
Next I would suggest clamping the two curved body pieces together and sanding them equally smooth (because if anyone is like me… my jig saw cuts can be a little wonky!).
Then the three main body pieces are ready to be attached together, like so, with glue and screws. (yet again, dog photo bomb)

Next I moved onto the wings. I cut two 30″ lengths from my 1×6 and rounded the ends with jig saw, using an ice cream pail lid as my circle guide. For the wings I also needed two 2x4x8 1/8 to act as spacers/connectors. I also used a piece of 1×6 with a curved shape for the handle bar area. No guide on how to cut… I just kind of “wung it”. **Important** attach this to the top wing from underneath. The 2×4’s can either be attached with pocket holes or screwed through the 1×6’s. After lots of sanding it looked like this…
Then it is time for the tail section. It is simply a 1×6 cut to 12″, same curve as the wings. Then I attached a 1×4 that I cut to 5″ long and rounded over one end. **Important** attach this to the tail from underneath.
Lastly (well, almost last), I cut the seat board from a 1×6 at 30.5″ long. I rounded the front end slightly less than I did the wings. Next time I will make the curve even slightly less.
The propeller is cut from a 1×3 scrap. It could really be cut from just about any size board you have laying around. I just kind of drew it on and cut it out with the jig saw. It is attached to the 2×4 in the front, after painting. Use a few washers to help keep it free to spin.
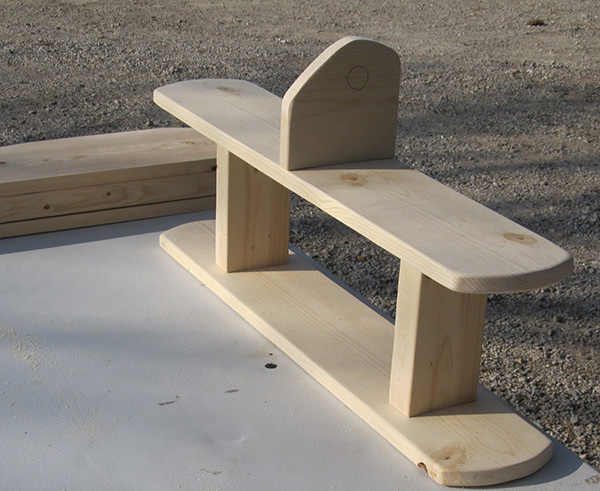
Then it is time to assemble! I started by attaching my tail with two screws and glue. Then I attached the seat board. And lastly I attached the wing section. For this I screwed two 1 1/4″ screws per side from under the wing into the seat, and two 2″ screws per side through the bottom wing into the 1×8 body boards (I really hope that all makes sense).
Then it is time for finishing. Sand sand sand. Sand over all edges nice and rounded to protect the little ones. Fill screw holes with wood filler. And paint with a quality exterior paint.
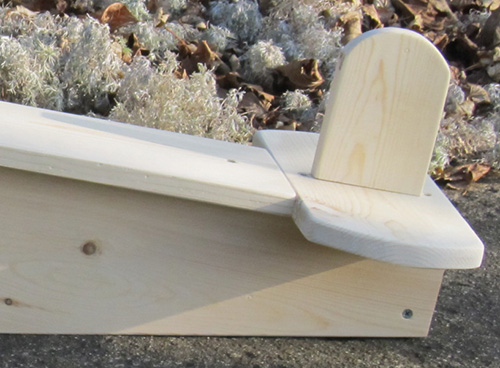
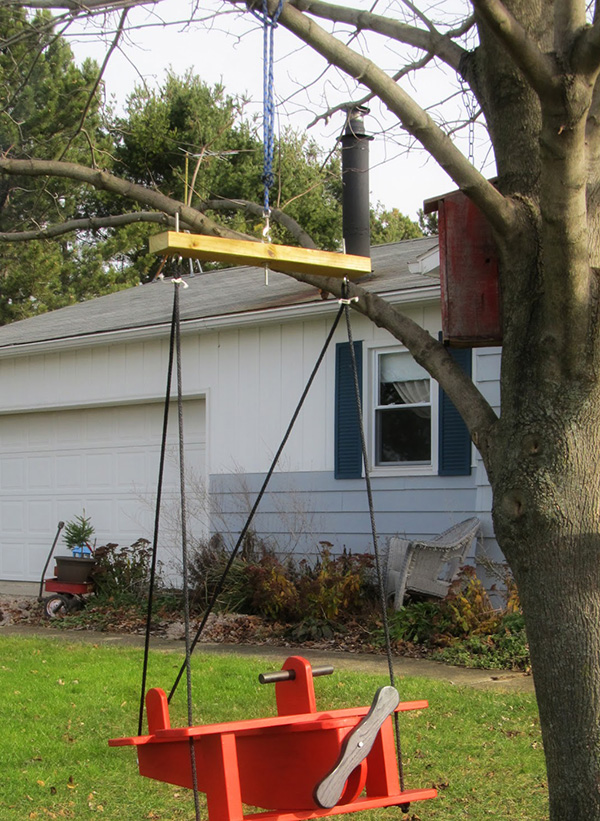
Now to hang it can get a bit complicated and this was another spot where it took a lot of thought. I may play around with other hanging ideas for my next one. See image for a little help on how to feed your rope. I used a scrap piece of 24″ pressure treated pine for my little up top board (I don’t know what that should be called. An anchor board maybe??). This board acts as a connecting point and has 3 eye lags, 2 pointing down and 1 pointing up. The one that points up is where the rope is connected from the tree or swing set. And the two that point down are to help guide the rope. Rope clips (in the photos I used rope to tie/hold because I did not realize I would need them) help hold the rope together at each eye lag to prevent the ropes from slipping, thus keeping the airplane level.

**Disclaimer**
Why yes, I did hang this from a dog leash. LOL… do NOT try this at home!
I had no other way to hang it without my hubby’s help… after all, I’m just a girl! 🙂
**End disclaimer**
NOTE- This photo shows only one eye bolt in the anchor board. I have redone this.
Use TWO bolts so that the swing hangs from two points in the tree. Otherwise, your airplane will fly wildly out of control. 🙂
If hanging from a swing set, this setup needs to be tweaked. Do not use a 2×4 anchor board. Instead, install chain quick links just above the rope clips. You can then attach the quick links directly to your swingset hardware. This way is actually much easier and probably a little cheaper.
Wow! That was wordy! I hope that this little tutorial can help others make their own versions. The cost should be around $40 depending on what materials you have on hand. What child wouldn’t want one? This airplane was made as a gift for my nephew but my 3 year old is really in love so I am pretty sure this won’t be the last one!
Oh I almost forgot to add… this could be modified into a rocking airplane soooo easily!!! I would change the 1×8 to a 1×12 and change the angles on the body cuts. That would be so fun for a baby/toddler.